About Azure AKS Default Node Pool


If you ever used Azure Managed Kubernetes service (AKS) you probably needed to change or delete the default node pool at least once. Default node pool is the one that is being created at the time of cluster creation, so essentially — the first node pool in the cluster. If you didn’t, then here's the spoiler alert — Azure won’t allow you to do it. Let’s dive into Azure AKS node pools and see how to delete that default node pool if you’ll ever need that.
What is a node pool and why would you need to have more than one:
A node pool as the name suggests groups x amount of nodes into a logical group (pool). Each of these groups can have a different configuration — and that’s the point of node pools. Nodes in one pool can have different VMs SKUs (different VMs types), different Kubernetes versions, different pod-per-node limits, etc.
From the Kubernetes perspective, they all land in the same basket by default — so for example if you’ll create 3 different node pools in Azure — you’ll see all the nodes from all 3 node pools in the output of kubectl get nodes.
What’s the point then? Well, I said, “by default”. But, by using a few Kubernetes mechanisms, you can use different node pools for different purposes. Few examples:
- Group your workflows logically, like one node pool for production applications, another node pool for dev/test.
- Group node pools by VMs type — have one node pool with standard machines and one extra node pool with bigger machines (more CPU/RAM) — for example, to keep specific applications that require more computing power on these.
- Group node pools by “importance” — for example, have one node pool which has a lower pods-per-node limit and runs older Kubernetes version to keep the most important microservices there and another node pool, with higher pods-per-node limit and latest Kubernetes version.
- Group node pools by autoscaling limits. For example — have one node pool with autoscaling set to some reasonable number and keep in this node pool all non-critical applications and another node pool with very high autoscaling limit for critical applications. In this way, when you’ll have a spike in the traffic, your main microservices (for example the one running APIs) will scale accordingly, but keep non-critical parts of the system on a node pool which will scale within some range but won’t scale too much to save costs.
These are only a few examples of why you would like to have multiple node pools for your AKS cluster. It all depends on your specific use case and your needs but the bottom line is, that usually — multiple node pools are useful.
Now, let’s discuss the “default” node pool. It actually isn’t officially called that way anymore, now it's referred to as "system node pool" but you may still find references to the old name.
Basically, we are talking about the node pool which is created at the time of creating your AKS cluster or the "first" node pool in the cluster. From Azure perspective, that node pool is being created as a “system” node pool and whenever you add a new node pool it will be created as a “user” node pool.
What’s the difference between these two then? “System” node pool simply runs pods needed for AKS to work properly (CoreDNS, Kuberentes Dashboard, tunnelfront/aks-link, metrics-server, omsagent, etc.). And as you can probably guess, a user node pool after being created has only kube-proxy pods on nodes, nothing else.
Unfortunately, in the Azure portal, you won’t see which is which. From there both look the same:

However, if you would try to delete the “secondpool” node pool, Azure would delete it just fine, but if you would try to do the same to the “agentpool” then Azure will complain:
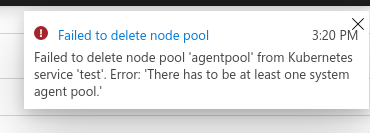
Since the “system” node pool contains pods created by Azure and needed for AKS to function properly then it makes sense to prevent deleting that node pool, right? But sometimes you really need to delete that default node pool (for example to recreate it with a different pods-per-node limit or simply different VMs type). In this case, your only option is to use Azure CLI “az”.
I mentioned earlier that within Azure Portal both node pools will look the same. But when listing node pools with “az” command you will see which one is a system and which is in user mode:

Now we have two options:
- Change one of your existing user node pools into a system node pool and then delete the default node pool
- Create a new node pool as a system node pool.
The first option is as easy as executing the following command:
az aks nodepool update --mode System --name [your_node_pool] --resource-group [resource_group] --cluster-name [cluster_name]...and similarly, the second option is to pass the same “mode” argument when creating a new node pool:
az aks nodepool add --mode System --name [your_node_pool] --resource-group [resource_group] --cluster-name [cluster_name]If you do one of these and list your node pools again, you should now see that we have more than one System node pool:

… and that lets you delete the default node pool without any issues (both via Azure Portal or CLI):
That’s it. To summarize: in order to delete the AKS default node pool, you need to create or nominate another node pool to be in “System” mode and as long as there is at least one system node pool then it doesn’t matter anymore for Azure which node pool you want to delete.